Creating New Files
- [General steps](#general-steps)Note: Building with Tina and Gatsby currently requires that you run a development server for content-editing. We recommend using Next.js for a solution with less friction.
An integral aspect of content management is the ability to create new content. To create new content files with Tina, you will need to configure and register content-creator plugins with the CMS.
Currently, Tina provides content-creator plugins for both Markdown and JSON files in Gatsby projects. Once registered, actions from these content-creator plugins are accessible from the sidebar menu.

Tip: Reference this blog for another detailed tutorial on adding & deleting files in Gatsby.
General steps
- Add a
content-creatorplugin - Register the plugin with Tina
- Configure how content is created by:
- Formatting the filename and path
- Providing default data (front matter, Markdown, or JSON)
Add Content-Creator Plugin
There are two content-creator plugins to use with Gatsby: RemarkCreatorPlugin for Markdown & JsonCreatorPlugin for JSON files.
These classes need to be instantiated with at least these three things:
label: A simple action label displayed when users interact with the + button in the sidebar.filename: A function whose return value should be the path to the new file.fields: An array of field objects. Read more on field definitions.
Markdown Example
import { RemarkCreatorPlugin } from 'gatsby-tinacms-remark'

const CreatePostPlugin = new RemarkCreatorPlugin({
  label: 'New Blog Post',
  filename: form => {
    return form.filename
  },
  fields: [
    {
      name: 'filename',
      component: 'text',
      label: 'Filename',
      placeholder: 'content/blog/hello-world/index.md',
      description:
        'The full path to the new Markdown file, relative to the repository root.',
    },
  ],
})
JSON Example
import { JsonCreatorPlugin } from 'gatsby-tinacms-json'

const CreatePostPlugin = new JsonCreatorPlugin({
  label: 'New JSON File',
  filename: form => {
    return form.filename
  },
  fields: [
    {
      name: 'filename',
      component: 'text',
      label: 'Filename',
      placeholder: 'content/data/puppies.json',
      description:
        'The full path to the new Markdown file, relative to the repository root.',
    },
  ],
})
Where To Add the Plugin
When adding a content-creator plugin, you'll have to consider when you want this functionality available to the editor. If the component where you registered the plugin is actively rendered on the site, you will be able to add new content via the plugin.
These are some places you may want to add the plugin:
- The Root component: it will always be available
- A Layout component: it will always available when that Layout is used.
- A Blog Index component: it will only be available when looking at the list of blog posts.
Now that we've created the content-creator plugin, we need to add it to the sidebar so we can access it. When we register the plugin to the sidebar, a create-icon will show up in the sidebar menu. Keep in mind this icon will only show up when the component that registers it is rendered.

Adding the Button to a Blog Index
In this example, we will add the button to the Tina sidebar when visiting the blog index page. There are 3 steps involved:
- Install
tinacms - Import
RemarkCreatorPluginandwithPlugin - Create the
content-creatorplugin - Add the plugin to the component
Example: src/pages/index.js
// 1. Import `RemarkCreatorPlugin` and `withPlugin`
import { withPlugin } from 'tinacms'
import { RemarkCreatorPlugin } from 'gatsby-tinacms-remark'

function BlogIndex(props) {
  const { data } = props
  const posts = data.allMarkdownRemark.edges

  return (
    <Layout location={props.location}>
      {posts.map(({ node }) => {
        const title = node.frontmatter.title || node.fields.slug
        return (
          <div key={node.fields.slug}>
            <h3>
              <Link style={{ boxShadow: `none` }} to={node.fields.slug}>
                {title}
              </Link>
            </h3>
            <small>{node.frontmatter.date}</small>
            <p
              dangerouslySetInnerHTML={{
                __html: node.frontmatter.description || node.excerpt,
              }}
            />
          </div>
        )
      })}
    </Layout>
  )
}

// 2. Create the `content-creator` plugin
const CreatePostPlugin = new RemarkCreatorPlugin({
  label: 'Create Post',
  fields: [
    {
      name: 'filename',
      component: 'text',
      label: 'Filename',
      placeholder: 'content/blog/hello-world/index.md',
      description:
        'The full path to the new markdown file, relative to the repository root.',
    },
  ],
  filename: form => {
    return form.filename
  },
})

// 3. Add the plugin to the component
export default withPlugin(BlogIndex, CreatePostPlugin)
NOTE: No changes need to be made to the
BlogIndexcomponent itself.
Creating Content
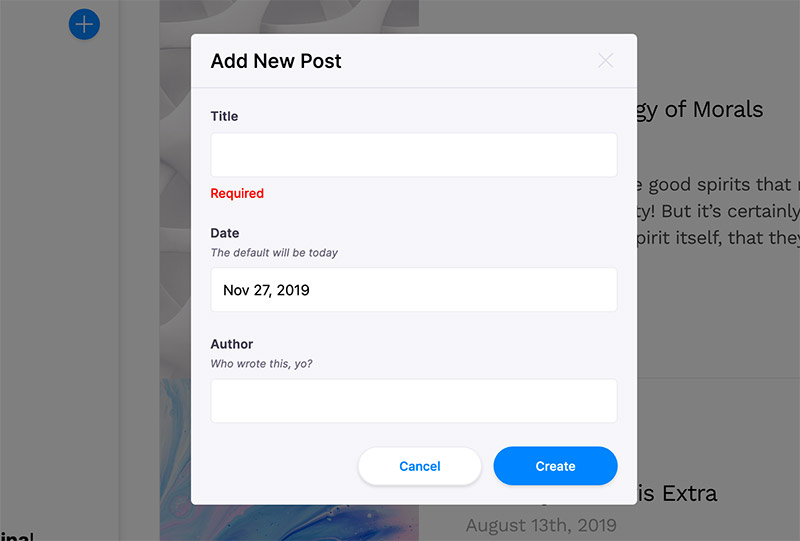
With the plugin in place, navigate to the page where you added the content-creator plugin, open TinaCMS and click the menu button in the top-left corner. The menu panel will slide into view with the button at the top.
Click the "Create Post" button and a modal will pop up. Enter the path to a new file relative to your repository root (e.g. content/blog/my-new-post.md) and then click "create". A moment later the new post will be added where you specified in the content-creator definition.